Lawn dry spots, runoff, and sprinkler overspray are usually symptoms, not diagnoses. The fastest way to waste water is to add minutes to every zone before finding out whether the dry area is receiving less water, whether the soil cannot absorb the application rate, or whether the grass is brown for a reason unrelated to irrigation.
This guide gives U.S. homeowners a practical sequence: watch one zone at a time, compare the pattern of damage with the spray pattern, measure distribution with catch cups, check the soil, and make the smallest correction that addresses the evidence. Always follow local watering restrictions and the equipment manufacturer’s instructions.
The short answer
| What you see | Most useful first test | Do not do first |
|---|---|---|
| A dry patch inside otherwise green turf | Compare catch-cup depth in the dry and green areas | Increase the whole zone runtime |
| Water on a sidewalk, driveway, wall, or street | Watch the complete arc of each nearby head | Assume wind is the only cause |
| Water begins moving downhill during a cycle | Time how long it takes for runoff to start | Keep running the zone until the planned minutes are finished |
| Fine mist hangs in the air | Compare the nozzle’s required pressure with actual system conditions | Install a larger nozzle without checking pressure and flow |
| One wet spot remains after shutdown | Observe whether it appears only after the zone stops or continues for hours | Assume every low wet spot is a broken pipe |
| Brown patches receive the same water as green turf | Inspect soil, roots, thatch, compaction, pests, disease, and chemical or pet damage | Keep increasing irrigation |
The U.S. Environmental Protection Agency’s WaterSense Sprinkler Spruce-Up guidance recommends inspecting each zone for leaks and damaged heads, directing water toward the landscape, maintaining uniform coverage, and using cycle-and-soak when runoff starts before the plant requirement has been applied.
Why these three symptoms often appear together
A sprinkler zone has to balance four things: the amount of water available, pressure at the nozzles, the way heads overlap, and the rate at which soil accepts water. A change in one part can create several symptoms at once.
- A tilted head can throw water onto pavement while leaving a dry shadow behind it.
- High pressure can turn a useful spray into fine mist that drifts off target and distributes unevenly.
- Low pressure or excessive demand can shorten the throw of multiple heads and create dry bands between them.
- A long runtime on compacted soil or a slope can produce runoff while the deeper root zone remains relatively dry.
- Mixed sprinkler types or unmatched nozzles can apply very different depths within one zone.
That is why appearance alone is not enough. Diagnose delivery, infiltration, and plant condition separately.
Step 1: Run and observe one zone at a time
Use the controller’s manual mode and stay outside for the entire test. Our zone-by-zone sprinkler audit explains the full process. For this diagnosis, mark each head and record:
- whether it rises fully and stands perpendicular to the soil;
- whether the nozzle is clogged, damaged, or missing;
- whether grass, mulch, a tree trunk, a shrub, or a landscape feature blocks the stream;
- whether the arc starts and stops at the landscape boundary;
- whether the spray reaches the next head as the design intended;
- whether droplets look normal or become fog-like mist;
- when and where puddling or runoff first appears; and
- whether a head keeps leaking after the zone shuts down.
EPA WaterSense describes adjacent-head overlap as head-to-head coverage. This does not mean blindly turning every adjustment screw until water reaches farther. Spacing, arc, nozzle family, pressure, flow, and manufacturer specifications all have to work together. A head that cannot reach its neighbor may have a clogged nozzle, insufficient pressure, poor spacing, or a design limitation.
Read the shape of the dry area
| Pattern | Possible explanation | Check next |
|---|---|---|
| A wedge or fan-shaped patch | Incorrect arc, blocked stream, or a non-rotating rotor | Watch that head through a complete rotation |
| A band between two heads | Insufficient overlap, low pressure, or incorrect spacing | Measure throw and catch-cup depth between heads |
| A green ring near a head with brown turf farther away | Head is too low, obstructed, tilted, or not throwing far enough | Inspect pop-up height and nearby turf |
| A patch behind a tree or shrub | The plant is blocking the water stream | Observe the dry shadow while the zone runs |
| Dry turf on a hot south- or west-facing edge | Higher exposure, reflected heat, or wind drift | Compare delivery first, then soil moisture and plant demand |
| Dry upper slope and wet lower slope | Water is moving downhill faster than it infiltrates | Measure runoff start time and probe both locations |
Step 2: Use catch cups to test the dry spot
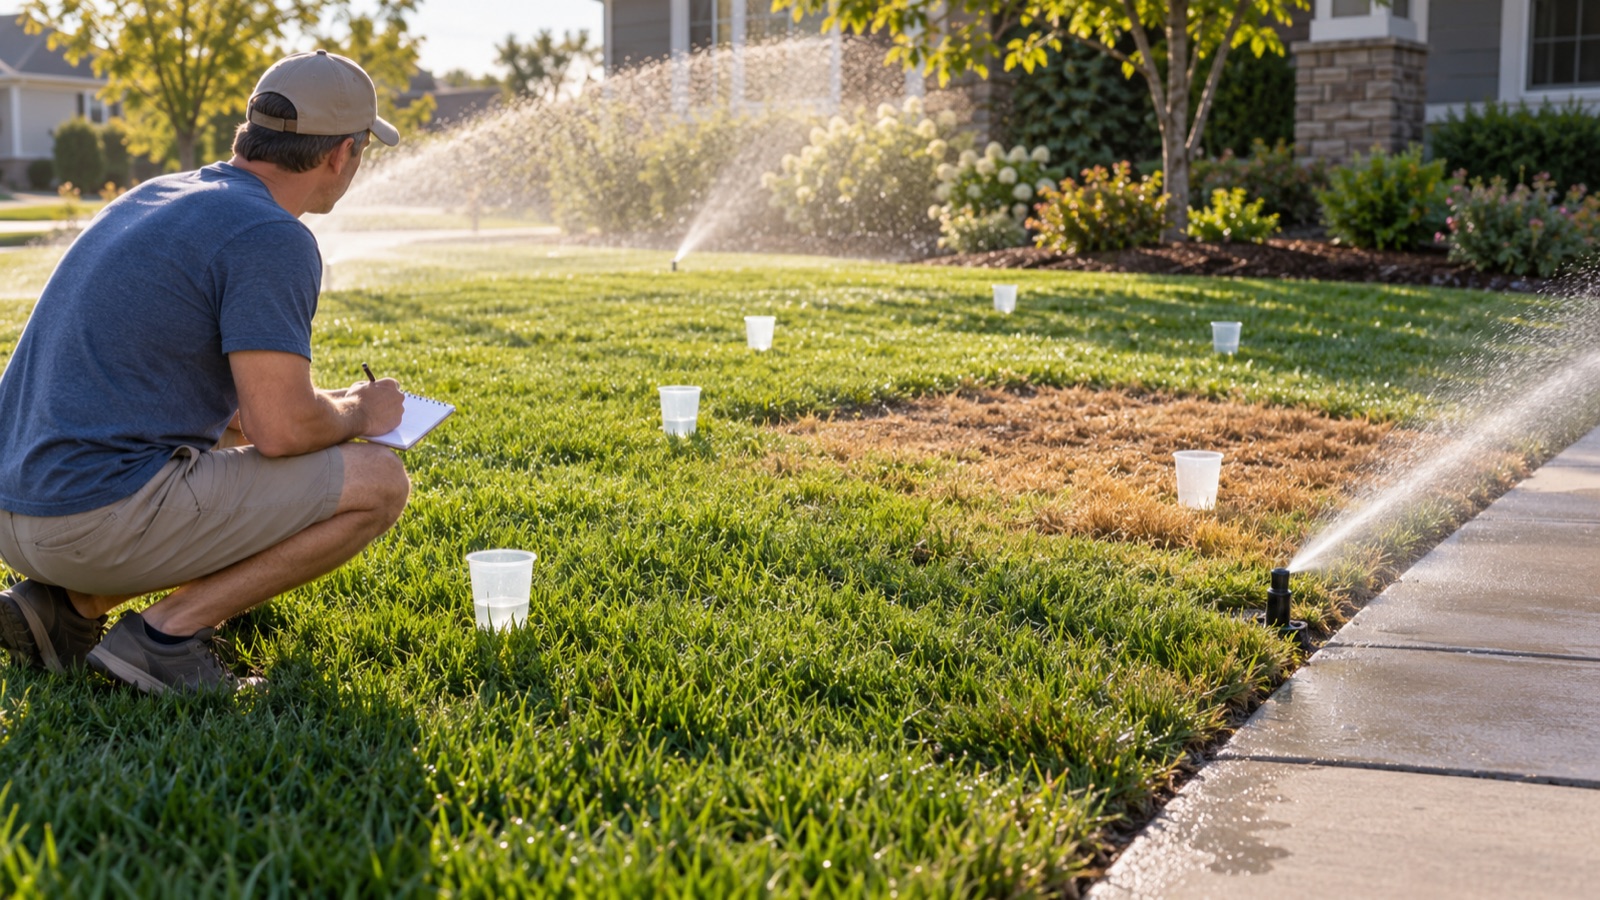
A catch-cup test converts a visual impression into evidence. Colorado State University Extension recommends placing identical containers in both healthy and brown turf, running the zone, and comparing the measured depths. If the dry area receives substantially less water, the problem is probably delivery or distribution. If it receives a similar amount, look at soil or plant causes before changing the schedule.
- Choose 8 to 12 identical, straight-sided containers that will sit level.
- Place several in the dry area, several in healthy turf, and several along the transition.
- Keep containers a short distance from sprinkler heads so one cup is not dominated by the stream at the nozzle.
- Run only that zone for a measured 15 or 20 minutes while watching for failures and runoff.
- Measure the water depth in every cup with the same ruler.
- Calculate the average for the dry area and the average for the green comparison area.

Example: the cups in green turf average 0.20 inch, while cups in the dry patch average 0.10 inch. The dry patch is receiving about half as much water during each cycle. Doubling the runtime would also double the water applied to the already green area. The better next step is to find the coverage defect.
Also compare the individual cups. One high reading can hide several low readings when you use only a zone-wide average. A wide spread suggests poor uniformity even if the average depth seems reasonable.
Estimate the zone application rate
If all cups ran for the same number of minutes, the approximate precipitation rate is:
precipitation rate (inches per hour) = average catch depth / test minutes x 60
If the overall average is 0.25 inch after 15 minutes, the measured rate is approximately 1 inch per hour under those test conditions. Use this value with the method in our seasonal watering schedule; do not treat it as a universal weekly requirement.
Step 3: Separate a delivery problem from a soil problem
After the catch test, push a screwdriver, soil probe, or narrow trowel into representative green and dry locations. Do this after irrigation and again shortly before the next scheduled event. Note how easily the tool enters, how deep the wetted soil extends, and whether water is perched at the surface.
| Catch cups | Soil observation | Most likely direction |
|---|---|---|
| Dry area catches less | Soil is also drier | Coverage, obstruction, pressure, nozzle, or spacing problem |
| Dry and green areas catch similar amounts | Dry-area soil is harder or wets less deeply | Compaction, thatch, hydrophobic surface, slope, or shallow soil |
| Dry and green areas catch similar amounts | Soil moisture is similar | Investigate roots, species, dormancy, heat reflection, pests, disease, pet urine, fertilizer, or chemical injury |
| Water collects at the surface | Deeper soil remains relatively dry | Application rate exceeds infiltration; use shorter cycles and address soil condition |
UC Statewide IPM notes that poor watering is a common cause of dead or dying lawn areas, but also recommends improving compacted soil and using a can test rather than guessing. Core aeration may improve infiltration in compacted turf at an appropriate time for the grass species; it will not correct a broken head, a leaking lateral line, or fundamentally poor sprinkler spacing.
Common causes of lawn dry spots
1. A head is too low, tilted, or blocked
A pop-up body needs enough clearance for the nozzle stream. Soil settlement, mower impact, roots, thick turf, or edging work can leave it low or crooked. Remove temporary vegetation obstructions and restore the head to the correct grade and vertical position using the manufacturer’s instructions. Shut the zone off before touching it.
2. The nozzle is clogged, worn, or mismatched
Debris can distort the pattern or reduce distance. A missing nozzle can release too much water and reduce performance elsewhere in the zone. When replacement is necessary, identify the exact body, nozzle family, arc, and flow requirement. EPA’s spray-irrigation technical guidance emphasizes matched precipitation within a zone. Randomly mixing spray and rotor heads, or unrelated nozzle families, can create large differences in applied depth.
3. Pressure is too low
Multiple short, weak streams can indicate insufficient pressure or flow. Possible causes include a partially closed valve, a leak, a clogged filter, too many high-flow nozzles, a restriction, or a system that was not designed for available supply. If a whole zone changed suddenly, look for a failure before redesigning it.
4. Pressure is too high
Excess pressure can produce misting, excessive flow, drift, and uneven coverage. EPA states that WaterSense-labeled spray sprinkler bodies regulate pressure at the nozzle and can improve distribution where incoming pressure is above the nozzle’s optimal range. Do not select a pressure solution from appearance alone; measurement and product specifications matter.
5. Wind, sun, and reflected heat differ across the yard
A windy or west-facing edge may dry faster than a sheltered area, but first confirm that it receives comparable irrigation. Correct the spray pattern and use permitted low-wind watering hours before adding water. Narrow strips beside pavement are especially difficult to spray efficiently; a landscape redesign or different irrigation method may be more durable than repeated nozzle adjustments.
6. Soil and roots differ
Construction debris, shallow soil over rock, compaction from traffic, thick thatch, tree-root competition, or a hydrophobic surface can make one patch behave differently. If cup depths match but soil wetting does not, an irrigation schedule alone cannot solve the underlying site limitation.
Why sprinklers overspray
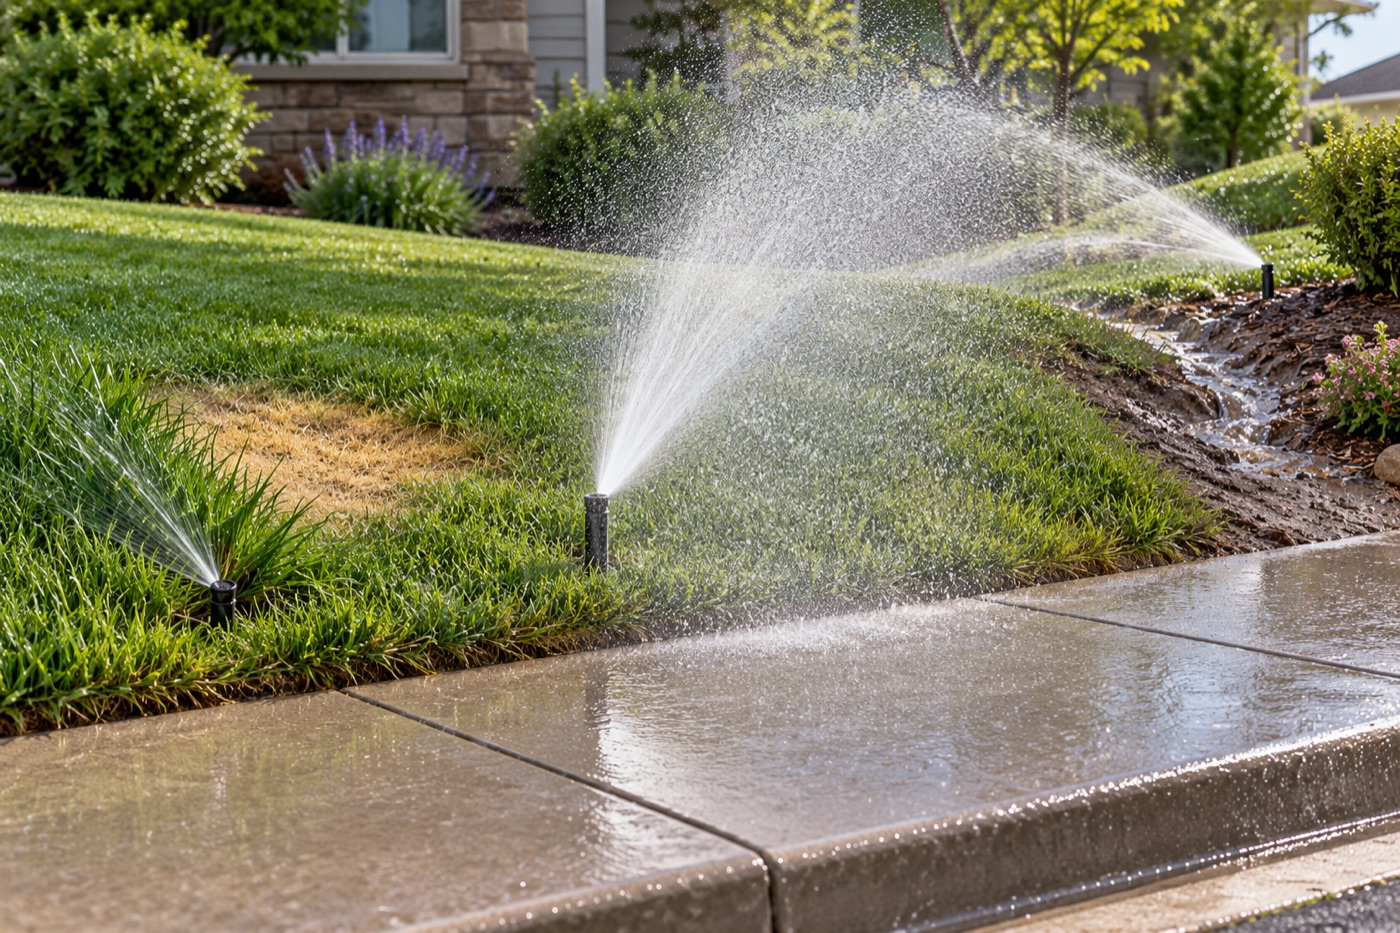
Overspray means water is applied directly to pavement, buildings, fences, or other non-landscaped surfaces. It is distinct from runoff, which begins on the landscape and then moves away. Both waste water, but the correction is different.
| Cause | Evidence | Practical response |
|---|---|---|
| Arc is set beyond the boundary | A defined stream repeatedly sweeps across pavement | Adjust arc within the approved range in the product manual |
| Head is tilted or displaced | The entire pattern lands off center | Correct position and grade with the water off |
| Nozzle radius exceeds the area | Even the minimum correct arc throws too far | Use a compatible design solution; do not simply throttle a nozzle beyond its range |
| High pressure creates mist | Fine droplets drift rather than following a stable pattern | Measure pressure and use an appropriate regulation strategy |
| Wind carries normal droplets | Direction changes with gusts | Water during permitted calmer hours and reassess the design |
| Narrow or irregular turf area | There is no practical spray geometry that stays on target | Consider drip, subsurface irrigation, or a non-turf water-smart planting where appropriate |
Do not bend or cap components without understanding how the change affects pressure and flow elsewhere. If the zone design cannot keep water off hardscape, ask a qualified irrigation professional to evaluate nozzle choice, layout, pressure regulation, and hydrozoning.
Why irrigation runoff starts
Runoff begins when water arrives faster than the soil can absorb it or when the root zone is already saturated. Common contributors include compacted clayey soil, steep slopes, thatch, long continuous runtimes, high-precipitation nozzles, low areas, and heavy rain before irrigation.
Measure the runoff start time
- Begin with soil that is not already saturated.
- Start one zone and record the time.
- Watch the lowest edge, sidewalk, curb, and any compacted or sloped area.
- Stop the zone as soon as water begins moving away from the irrigated surface.
- Repeat on another day to confirm the pattern instead of basing a permanent program on one unusual event.
If runoff consistently starts at eight minutes but the calculated total is 24 minutes, begin by testing three shorter cycles with soak periods between them. The total does not automatically need to increase. Our guide to cycle-and-soak irrigation for clay soil and slopes explains how to build and verify the sequence.
Cycle-and-soak manages timing; it does not fix a broken nozzle, saturated soil, a failed valve, severe compaction, or a design whose application rate is fundamentally inappropriate for the site.
Do not assume every brown patch needs more water
Brown turf can result from drought stress, but it can also reflect disease, insects, dog urine, fertilizer or herbicide injury, fuel spills, mowing damage, dormancy, shade, root competition, or poor drainage. Penn State Extension notes that brown patch disease is favored by hot, humid conditions and can be aggravated by prolonged leaf wetness and lush growth. Adding nighttime irrigation to an undiagnosed fungal problem may make conditions worse.
Use these clues only to decide what to investigate; they are not a remote diagnosis:
- Damage exactly follows a spray gap: investigate irrigation distribution first.
- Small circular spots with a dark green edge: consider concentrated pet urine or fertilizer, not just dryness.
- Distinct leaf lesions, morning mycelium, or rapid spread in humidity: consult Cooperative Extension or a turf professional for disease identification.
- Turf lifts easily with damaged roots: investigate insects or root problems.
- The area stays wet yet plants wilt: check drainage and root health before adding water.
A repair order that avoids unnecessary spending
- Correct obvious maintenance faults: broken, clogged, tilted, buried, or obstructed heads.
- Restore intended settings: verify arc and radius against the manufacturer documentation.
- Retest distribution: repeat catch cups before changing controller minutes.
- Address runoff: shorten individual cycles, add soak time, and evaluate compaction or nozzle application rate.
- Confirm zone compatibility: avoid mixing equipment with different precipitation rates. Our comparison of drip irrigation and spray sprinklers explains why different devices generally require separate zones.
- Adjust the schedule last: use the measured rate, weather, rainfall, plants, and soil instead of compensating for defects with longer runtime.
When to call an irrigation or landscape professional
Homeowners can usually observe zones, place catch cups, clean accessible nozzles according to the manual, remove vegetation obstructions, and adjust controller timing. Obtain qualified help when:
- pressure or flow requires instrumentation and hydraulic diagnosis;
- a buried pipe, manifold, valve, or mainline may be leaking;
- the system needs layout, nozzle-family, or zone redesign;
- work approaches electrical wiring, pumps, municipal connections, or regulated backflow-prevention equipment;
- excavation could reach utilities or unknown services;
- persistent turf damage needs pest, disease, soil, or plant identification; or
- the yard includes a steep or unstable slope, drainage risk, or water entering a structure.
Call the local utility-marking service before digging and comply with local plumbing, backflow, drought, and watering rules. A WaterSense-certified irrigation professional can be useful for a formal audit or redesign.
Monthly five-minute check
- Run every zone while watching it.
- Look for blocked, tilted, broken, missing, or leaking heads.
- Keep water off streets, walls, sidewalks, and driveways.
- Note new dry, wet, or rapidly growing patches.
- Check rain, freeze, weather, or soil-moisture sensors.
- Compare controller settings with current weather and local restrictions.
- Repeat a catch test after nozzle, pressure, or layout changes.
Frequently asked questions
Should I add more minutes when one part of the lawn is dry?
Not until you compare delivery. If the dry patch receives less water than healthy turf, adding minutes will overwater the rest of the zone. Correct the coverage problem and retest first.
How can I tell whether sprinkler pressure is too high?
Persistent fine mist, excessive drift, unusually high flow, and unstable coverage are clues, not a complete diagnosis. Identify the exact nozzle requirements and measure pressure using an appropriate method. Pressure-regulated sprinkler bodies or valves may help when correctly selected.
Is water draining from the lowest head always a leak?
No. Water remaining in lateral piping can sometimes drain through the lowest head after shutdown. A check valve may be appropriate for compatible equipment. Water that continues for a long period, appears when the system has not run, or causes persistent saturation needs further diagnosis.
Can cycle-and-soak fix compacted soil?
It can reduce runoff by matching application timing more closely to infiltration, but it does not remove compaction. Soil improvement, appropriate aeration, plant selection, or irrigation redesign may still be necessary.
How often should I inspect sprinkler coverage?
Inspect at startup, after mowing or landscape work, after a freeze, after a noticeable pressure change, and regularly during the irrigation season. EPA WaterSense recommends regular system checks because damaged heads and leaks can be difficult to notice when systems run before dawn.
Editorial note: This general guide for U.S. homeowners was reviewed on October 3, 2026 against resources from EPA WaterSense, EPA spray sprinkler bodies, Colorado State University Extension, CSU’s lawn irrigation audit tutorial, UC Statewide IPM, and Penn State Extension. Local soil, turf species, equipment, water rules, climate, and codes vary.